Bot launch instructions
Step 1. Installing Google Chrome on your PC.
Follow the link to download Google Chrome and install it on your PC. – ( https://google-chrome.ru.uptodown.com/windows/download/115712844 )
Step 2. Open our TwitterHub bot application.
Follow the link to download – ( https://www.ej-developer.com/uk/update-twitterhub-bot/ )
.
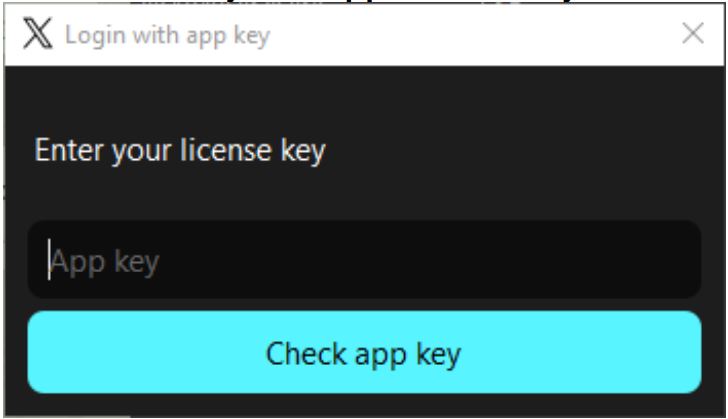
A window with the input of the license key will appear.
Enter your license key to use the program.
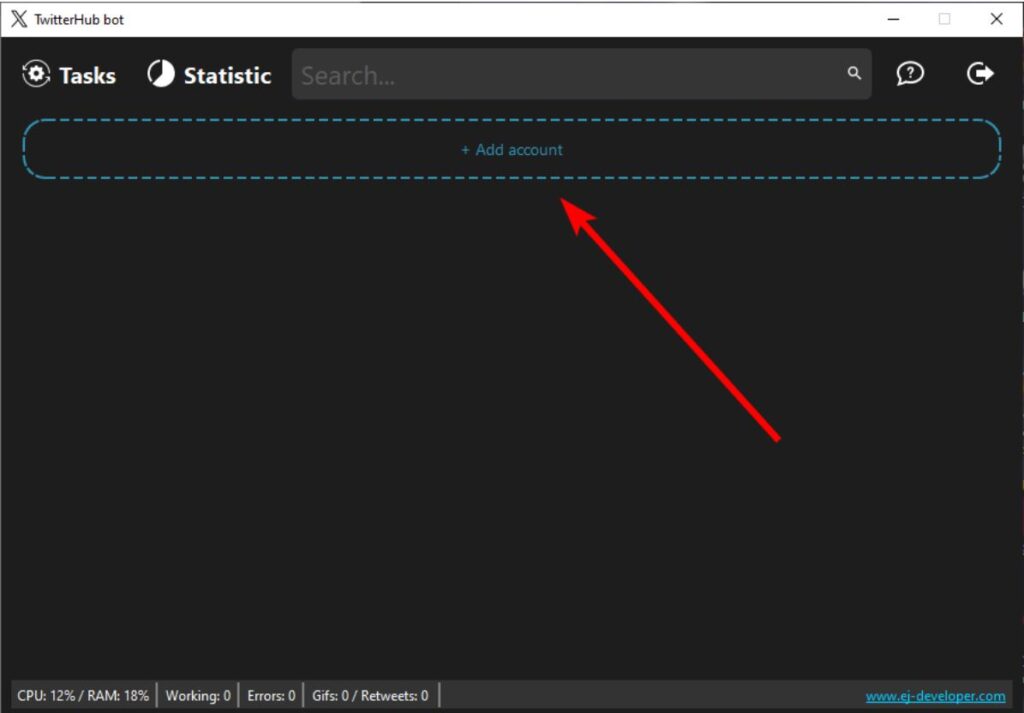
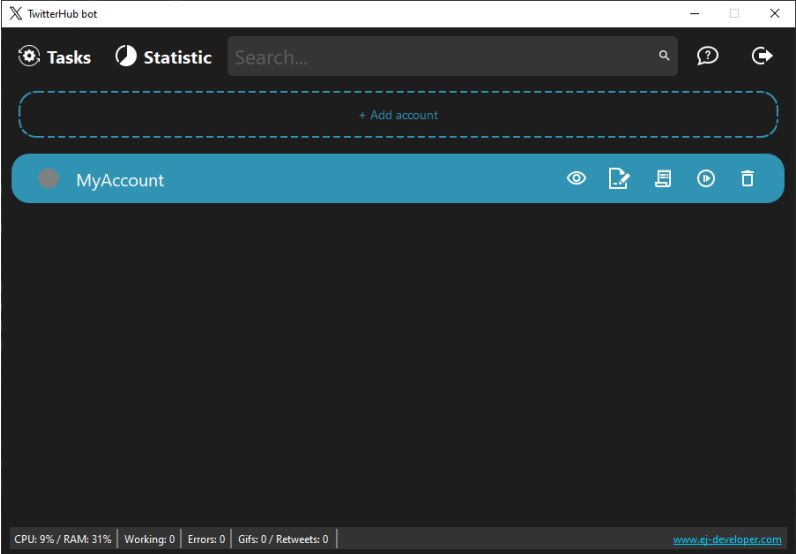
Step 3. After successful authorization, we need to add the bot. Click the ‘+ Add account’ button.
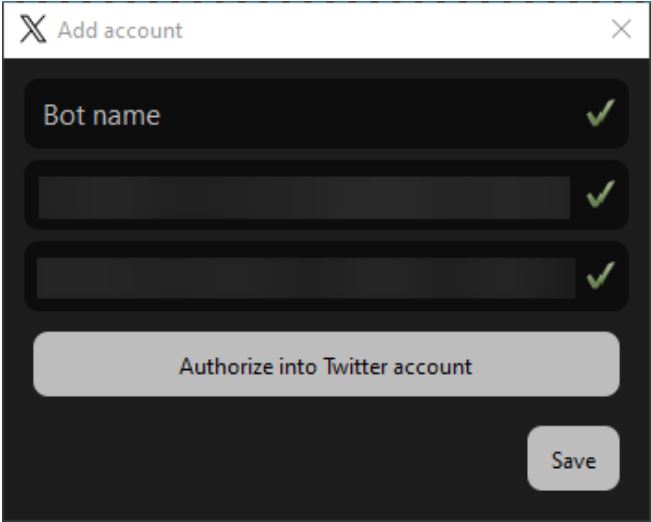
A window will open where we need to enter in 3 fields the bot’s name, proxy, and user-agent.
On the right of the field, green checkmarks will appear confirming that the entered data is in the correct format.
It is noted that only Latin and Cyrillic characters are allowed in the name field.
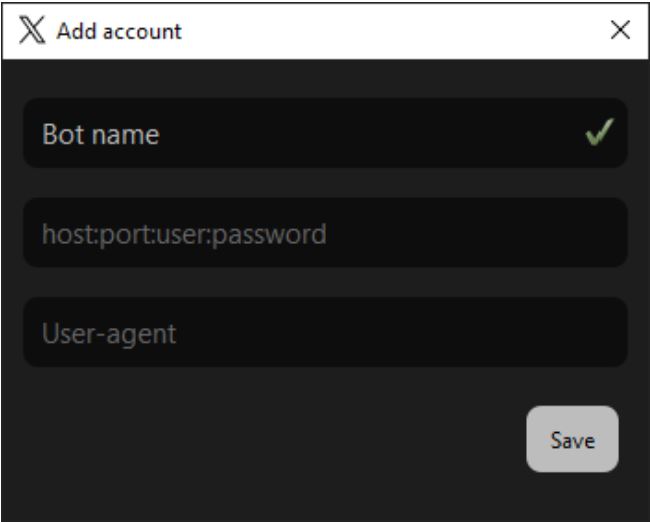
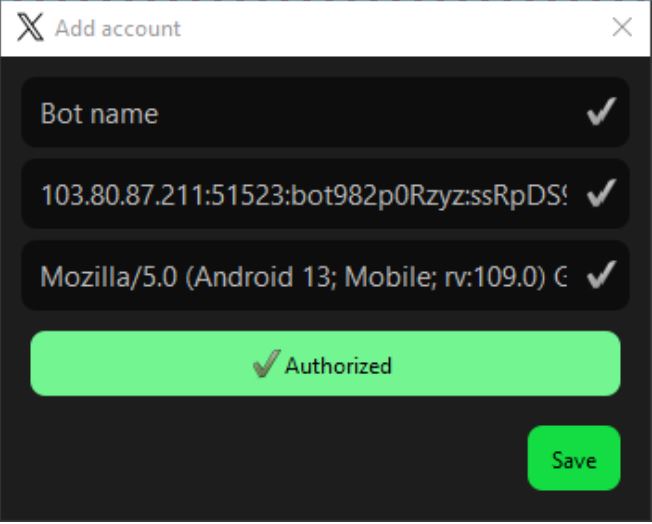
If all the data is in the correct format, the ‘Authorize into Twitter account’ button will appear.
Click on it. The Chrome browser will open with the login page for the Twitter account.
The browser may not open immediately, so just wait for some time.
Attention! Do not close the browser manually! The browser will close automatically after successfully logging into the Twitter page.
Once the browser opens, proceed with the authorization in your Twitter account.
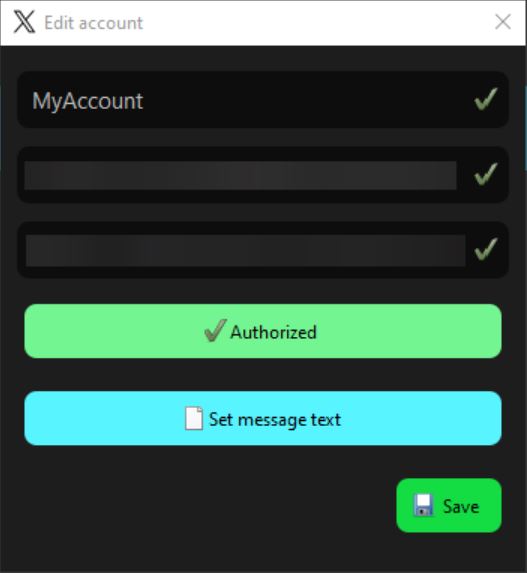
After successfully authorizing the Twitter account, the browser will close, and in the bot addition window,
the button will turn green with ‘Authorized,’ and the ‘Save’ button will be available. Click on the ‘Save’ button.
Step 4. After saving the account, we can launch it.
Here are 3 methods for launching your bot.
Method 1. Manual launch. A frame with the bot’s interaction will appear in the application. Click on the Start button
When hovering over the button, a dropdown window with the button description will appear.

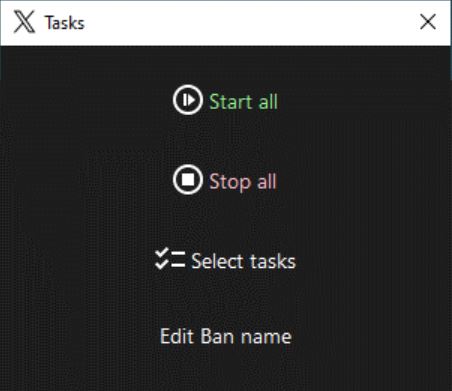
Method 2. Mass launch. Open the ‘Tasks’ window by clicking on the corresponding button.
Click on the ‘Start all’ button. After that, all bots will start one by one
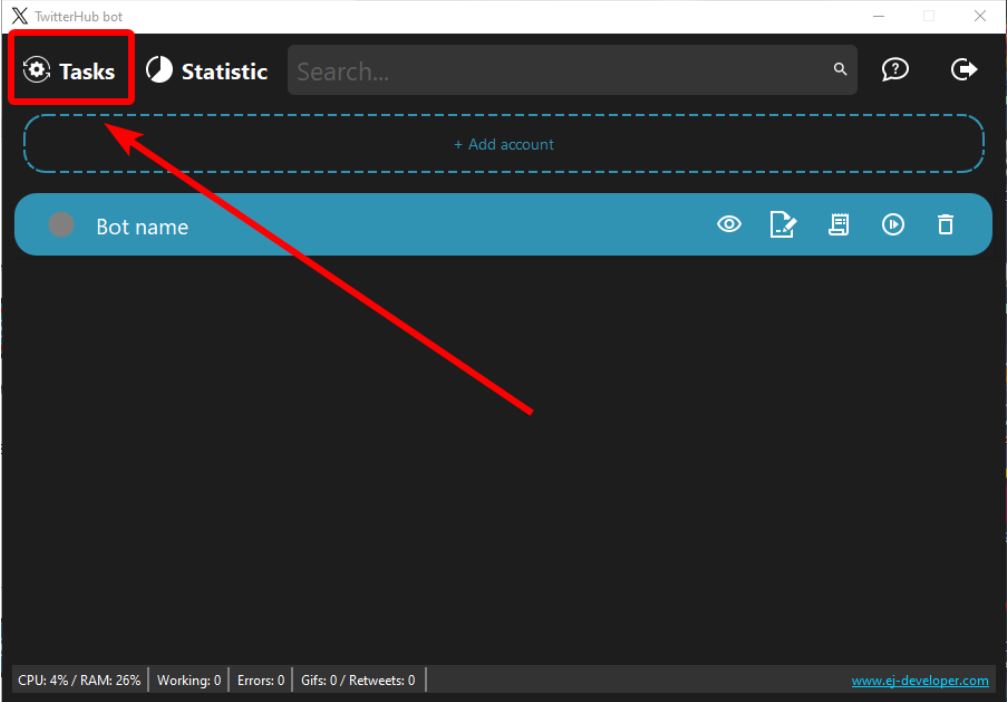
Open the ‘Tasks’ window
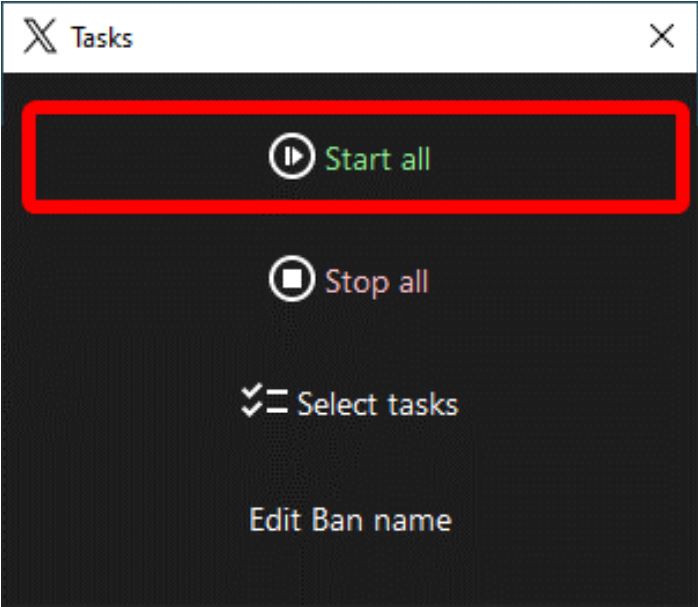
Click on the ‘Start all’ button.
Method 3. Selective launch. Open the ‘Tasks’ window by clicking on the corresponding button. Click on the ‘Select tasks’ button.
After flags will appear in front of the bot names. Click on the flags of the bots you want to launch,
then click the ‘Start selected’ button. After that, the bots you selected will start one by one.
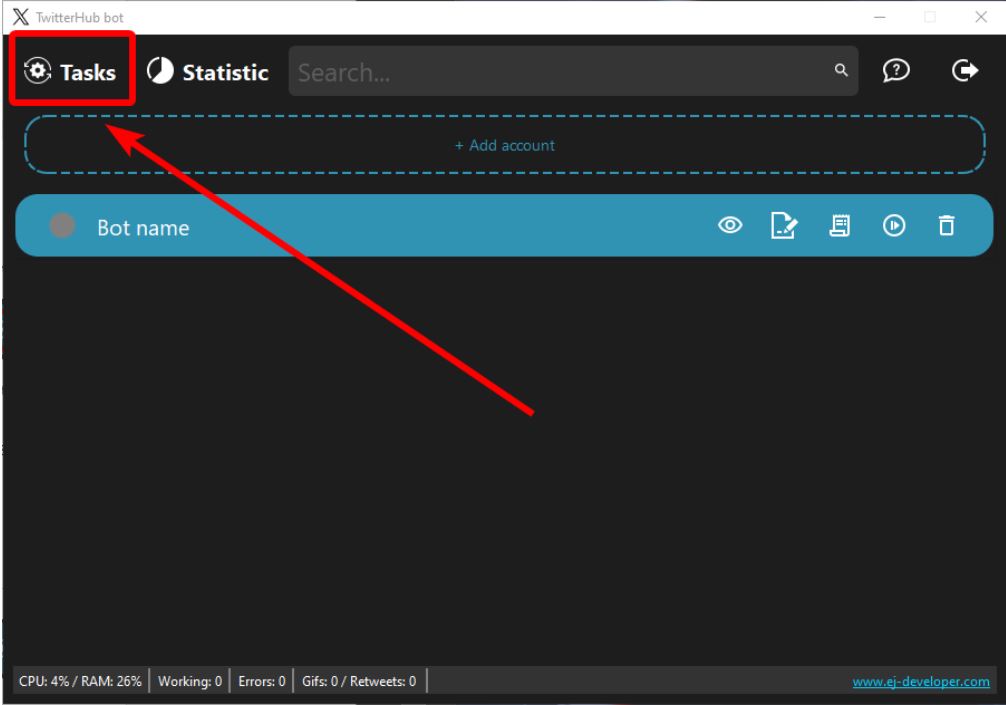
Open the ‘Tasks’ window.

Click on the ‘Select tasks’ button
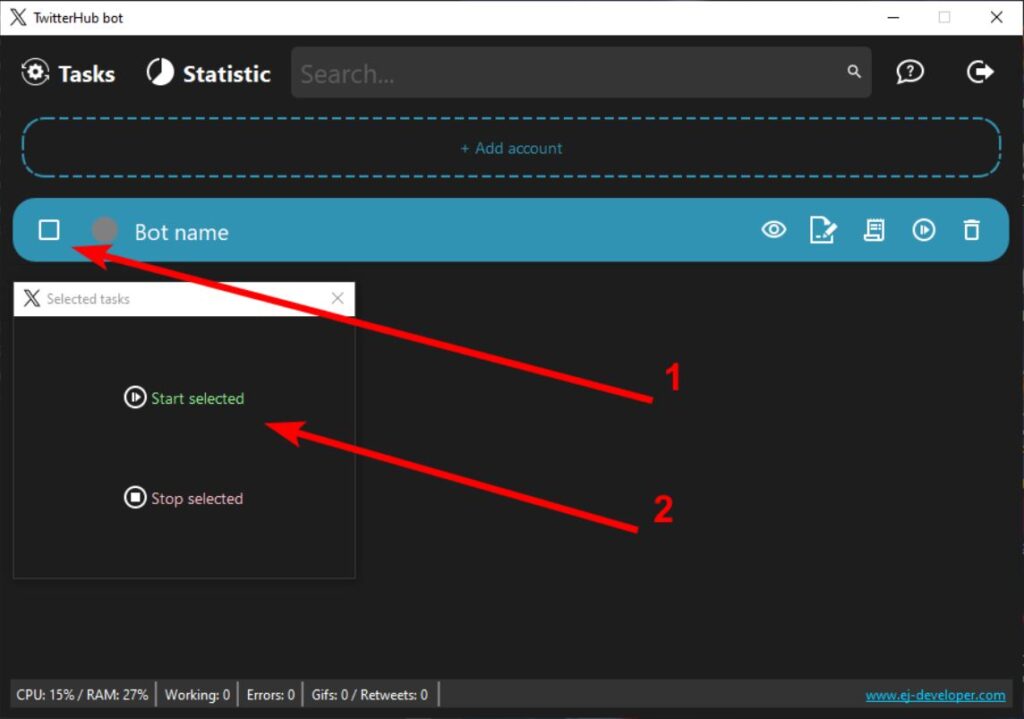
Check the box and click on the ‘Start selected’ button.
The launch process will begin. After a successful launch, the gray indicator in front of the bot’s name should turn green
![]()
Congratulations! You have launched your bot. Enjoy your work.
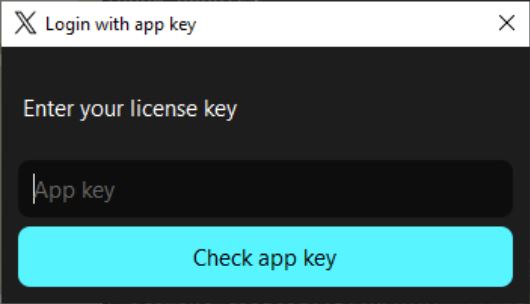
Login with app key window
Afterward, you will have access to all the program’s functionality.
The ‘Tasks‘ button opens the bot management window. In this window, there are other buttons like ‘start all‘, ‘stop all‘, and ‘edit ban list‘.
The ‘Start all‘ button launches all the bots you have added.
The ‘Stop all‘ button halts all the running bots.
The ‘Select tasks‘ button allows you to start/stop bots selectively. After pressing this button, a checkbox will appear next to the bot’s name, which you need to click to select it.
The ‘Edit ban list‘ button opens a list where you can add Twitter profile names that the bot will ignore.
Tasks window
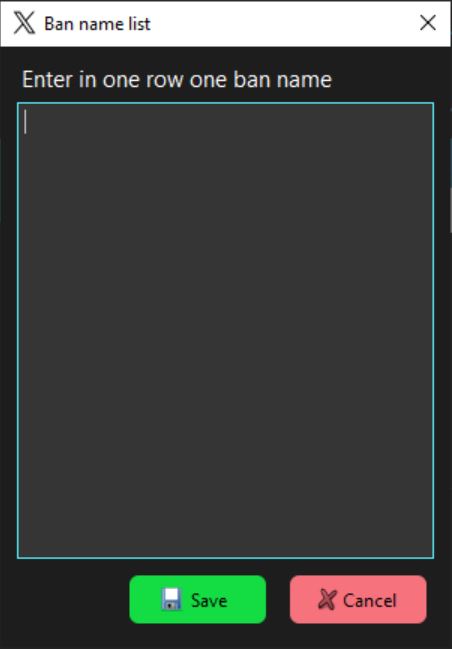
Ban name list window
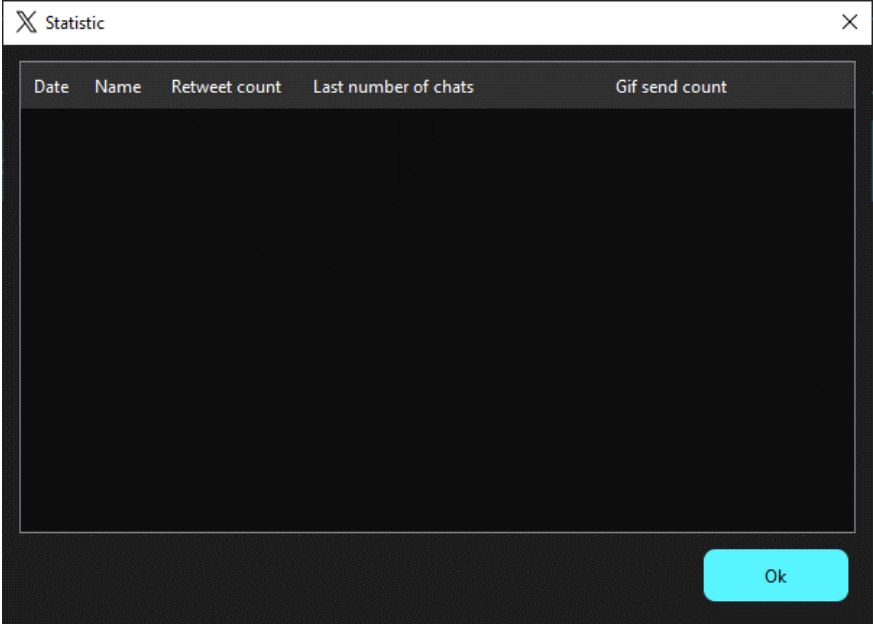
The ‘Statistics‘ button will display all the account activity statistics.
The ‘Support‘ button will allow you to contact the program’s technical support team to resolve issues, and you can also export all program logs to your PC
(which may be useful for the technical support team in resolving your problem)

Support window
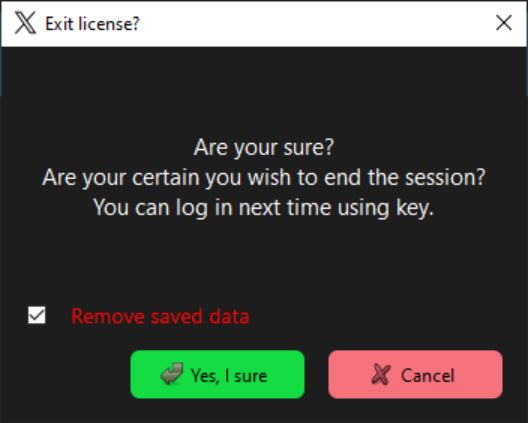
The ‘Exit license‘ button will exit the program along with the license key, and it will also give you the option to delete saved program data
The ‘Search’ field locates your bot by its name.
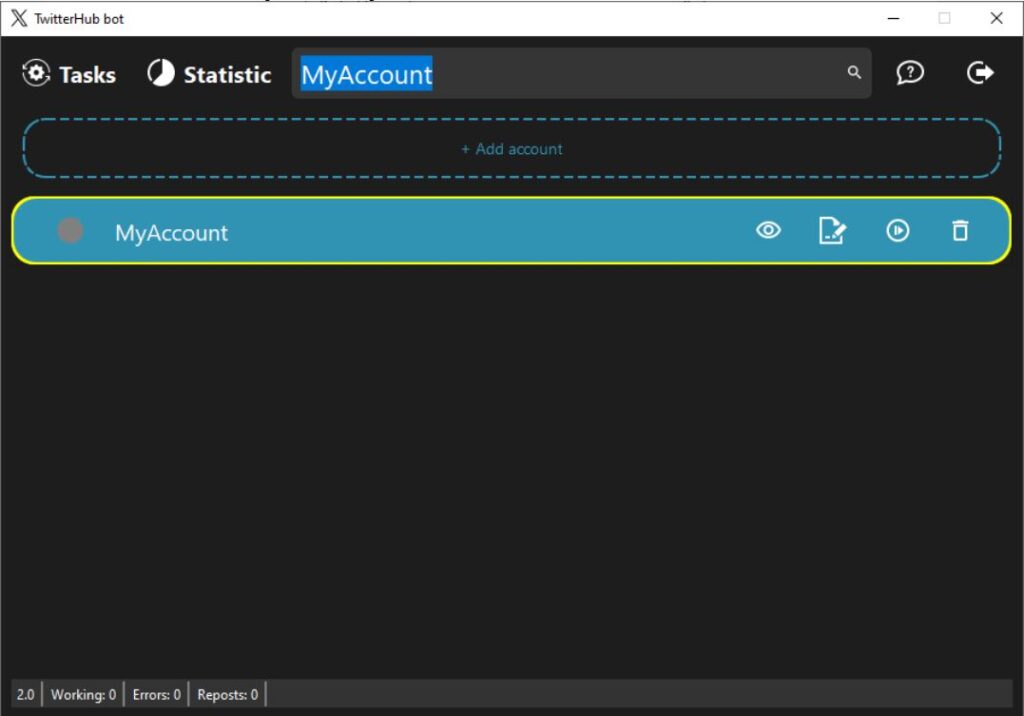
The ‘Add account‘ button adds a stream to the application for the bot, which will handle activity on your Twitter account.

Add account window
In the ‘Add account‘ window, there will be three input fields where you should enter the respective information.
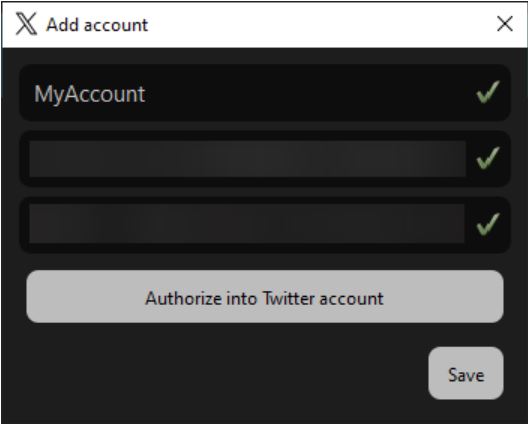
Next to the fields, a green checkmark will appear to indicate that all the data has been entered correctly according to the format.
After that, a ‘Authorize into Twitter account’ button will appear, which will open a browser with the Twitter login page.
Attention! Under no circumstances should you manually close the browser; the program will handle it for you when it deems necessary.
As soon as you log into your Twitter account, and the browser has been closed by the program, the ‘Add account’ button will appear, which will create a stream for the bot.
![]()
Clicking the ‘View‘ button will open a browser with your account for free viewing of its activity (you can close the browser at any time).

If desired, you can click the ‘Edit‘ button, where you can modify the stream’s data.

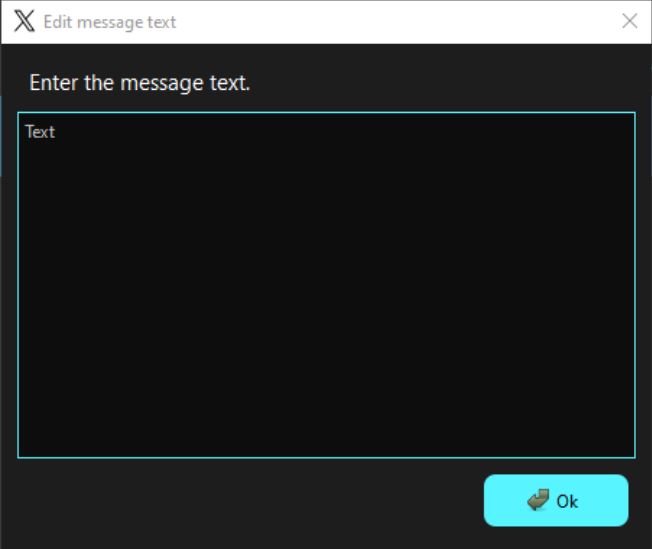
In the account editing mode, the ‘Set message text‘ button will be available.
The bot can use this button to send pre-prepared text to the chat
Edit account window
Edit message text window
Keep in mind that since the bot operates as a process, changes to the text message will take effect only after restarting the task.
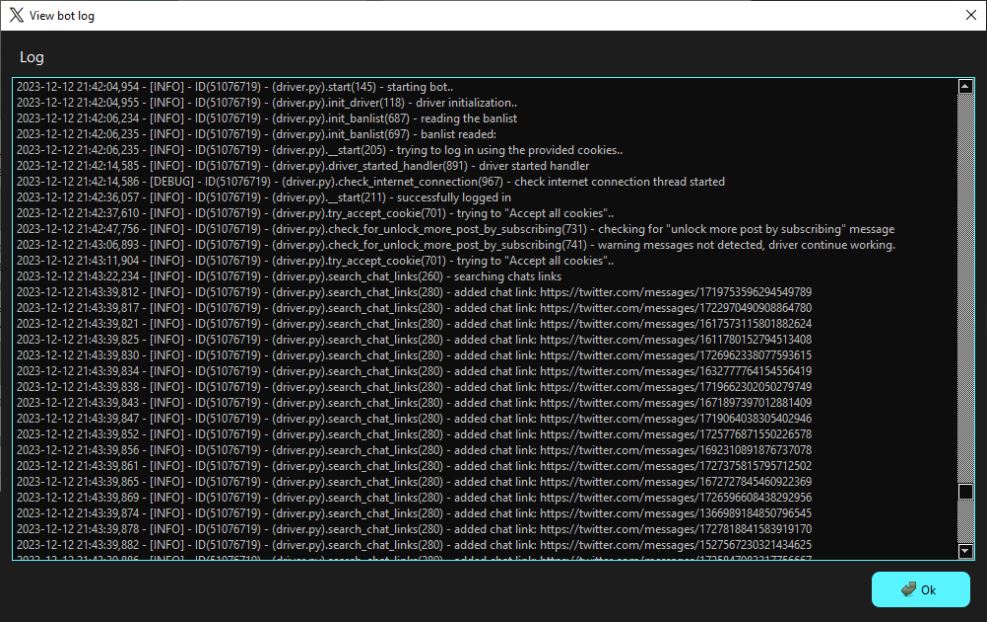
The ‘View bot log‘ button shows the entire activity log of the bot.

You can start the bot’s stream by clicking the ‘Start‘ button.

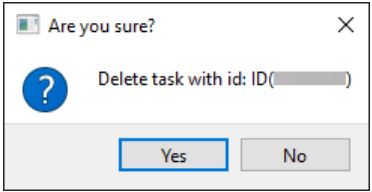
The ‘Delete account‘ button removes the bot.